
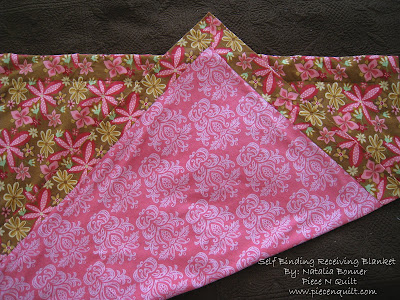
Self Binding Receiving Blanket
1 Yard front flannel (pink)
1 1/4 Yards back flannel (brown)
1 1/4 Yards back flannel (brown)
 Create two squares. Backing square 44" 44" (we prefer to tear the fabrics because the blanket will lay flatter). Front square 34"X34"
  Find and mark the center on all four sides of both pieces of fabric.
  Turn the fabrics so the right side is facing each other. Pin the centers on all four sides together.
  Starting in the middle on three of the sides stitch from the center to the 1/4" from the end (allowing for seam allowance. On the fourth side you will leave a 6" opening where you will eventually turn the quilt right side out.
Find the corner on all four sides of the backing fabric (brown).
 You will be creating a mitered corner. Press the corner.
  Fold that corner over itself creating a crease where you will stitch the corner. Press creating a line to sew down.
 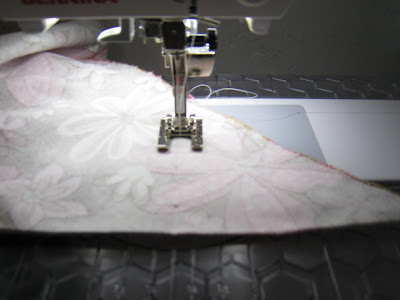 Stitch along that line on all four corners.
  Cut off excess material on all four mitered corners. Discard of excess material.
  While the materials are still inside out press the front (pink) material toward the brown all the way around. After pressing use the 6" hole and turn the blanket right side out. Press again ensuring that the quilt is square. We like to press the edges very flat using starch.
  Top stitch with matching thread all the way around the blanket on the edge of the backing (brown material). Here is your finished product. In no time you've created a beautiful receiving blanket.
  Note: We used Woodland Bloom flannels by Lila Tueller for Moda fabrics. Click HERE to purchase.
The following are a few Self Binding Receiving Blankets that we've made.


These blankets are my favorite thing to make for baby showers!
ReplyDeleteThanks for the tutorial. I've been wanting to make some recieving blankets and didn't know how to start. Now I know how.
ReplyDeleteThese are awesome. Just what I needed for gifts. This is one of my favorites!
ReplyDeleteThis is a great tutorial. I made the cutest blanket today because of it. Thanks!
ReplyDeleteDo you prewash your flannel? You didn't say, I don't think.
ReplyDeleteLove this receiving blanket for my new little grandson due end of Oct or early Nov!!
Jackie in San Antonio
Jackie-
ReplyDeleteNo, I do not pre-wash the flannel. Actually I don't pre-wash any of my material! :)
I am trying to follow your directions, but I am wondering if you fold the edges down then sew to center? I am not exactly sure what to do after pinning centers together.
ReplyDeleteLovely & easy! Thanks for sharing!
ReplyDeleteThese are so much nicer than those store bought single layer ones. Thanks for the tutorial.
ReplyDelete;o)
Carolyn
Awesome tutorial, what a great baby gift those would be! Love it, Thanks!
ReplyDeleteLooks great, thanks for the tutorial.
ReplyDeleteI'm confused about this, too. Do I pin the fabrics together at center, then match the edges, then sew?
ReplyDeleteTo answer your questions. Yes, you do pin all four centers together and sew from there. It's really very simple:)
ReplyDeleteI found this link through Cluck, Cluck Sew and I'm so very glad I did!
ReplyDeleteThe directions were very easy and I love pictures. I cranked out two of these blankets for a shower I went to yesterday - I loved it and so did mom-to-be. I will definately be making more.
Oh My Goodness! I love this! It was so easy, I practiced first on some old fabric just laying around and now I need to go out and get some flannel to make some more! Thank you!!
ReplyDeleteThanks for the great tutorial! Very easy and cute!
ReplyDeleteThank you! Thank you! Thank you! I have been wanting to make one of these for a long time and just couldn't figure it out. Mine is so cute: Winnie the Pooh on the back and yellow on the front.
ReplyDeleteI don't know what I am doing wrong but my corners donot come out mitered.
ReplyDeleteThe edging is done all very well.The blankets are made of flannel aren't they?They are lovely combination of colors.
ReplyDeleteMy blanket has such great potential but I just can't get it to work...My flannel is not wide enough to get a 44" square. Has anyone worked out how make this smaller? I can get about 40" for the large square....what size should the smaller one be?
ReplyDeleteThanks.
It does not matter really the size as long as the smaller piece is 10" from bigger piece any size variation..
DeleteThank You so much. I have spent the last 2 hours looking for a decent video or any instructions to do this. I was making to so much harder than it really is.
ReplyDeletethanks so much! I am so fired up. Now all the pregnant ladies at my church (there are at least 9 including me) will be getting some really cute blankets for their little ones! I appreciate your willingness to share your patterns with me!
ReplyDeletethanks so much! I am so fired up. Now all the pregnant ladies at my church (there are at least 9 including me) will be getting some really cute blankets for their little ones! I appreciate your willingness to share your patterns with me!
ReplyDeleteThank you!!!! Was needing an easy pattern for these and this is excellent.
ReplyDeleteThis doesn't make sense to me either... anybody willing to do a video on the mitered corners?
ReplyDeleteSee this link here for the mitered corners. I was confused a bit too, and she explains it in a way I understand better.
ReplyDeletehttp://every-day-mom.blogspot.com/2009/10/self-binding-receiving-blanket.html
Thanks for posting this! SO cute!
Made one of these last night, GREAT tutorial, super easy and fast, and it looks great! Thanks so much for sharing! I even changed the measurements and made a matching burp rag to go with it!
ReplyDeleteI love all of your tutorials!
Do you have a flickr group for people who have made things with your tutorials? I know that MBS has one, and I found your personal flickr, but it would be neat to have a group where we can share with you our creations made from your ideas :)
ReplyDeleteCan someone help me with the mitered cornor. I don't understand the photo because the white thread doesn't show up and I folding over itself is confusing to me.
ReplyDeleteI always seem to get one side of the binding a bit narrower than the rest of the quilt thus a cornor is smaller.
Thank you.
Christine
to Anonymous: Don't worry about your fabric being only 44". You actually just need to cut the back piece 10" bigger than the front. I had the same problem, so I cut my back 40" and my front
ReplyDelete30"....works great every time.
Really can't wait to try this...so cute!
ReplyDeleteThanks for sharing this amazing TUT!!
ReplyDeleteThis is a great tutorial. I just made one, and now I can't wait to make more. Thanks.
ReplyDeleteJust made another and blogged and linked back to you. Love this tutorial. Many thanks.
ReplyDeleteI don't quite understand the corner part? can you maybe zoom out and do more step by step?
ReplyDeleteJust found this and I love it! I too had to take a second look at the corner part, but it was like a light bulb came on and I got it. Thanks SO much for making it so easy when all the other tutorials made it more difficult than it has to be. Just finished my first and am going to be making more. Thanks Again!!!
ReplyDeleteGreat tutorial! And thanks for the tip about tearing the fabric. It really seems to make a difference!
ReplyDelete[Unfortunately the first one I made was with inexpensive flannel that had a print that wasn't even close to being on grain. Luckily a good steam pressing helped it enough. Now I know not buy a print like that (or atleast not on cheap flannel) :)]
I have made several blankets like this one. There is a video that I watched that shows more on the mitered corners. go to
ReplyDeletehttp://www.youtube.com/watch?v=lqwdNqMZ8Ro
Hope this is a help.
Pam
Thanks for the tutorial. I was a little confused and nervous to try. So I wanted to share my tip, I cut a a4 inch square and a 5 inch square and followed the instructions. I didn't get it right the first two times, but after ripping one more time, on the third time I got it perfect. I practiced again on another 4inch and 5 inch square. I now have the confidence to tackle the blanket and two cute coasters.
ReplyDeleteOh wow those are cute. Thanks for sharing the tutorial. I'll have to try this out soon
ReplyDeleteMy mother (age 75) has been making flannel rec. blankets for years with matching burp rags. I followed in her footsteps, I really love this version. I love the wide border/binding. I only started quilting four years ago, but will return to this for baby shower/new baby gifts.
ReplyDeleteThanks for posting directions.
Thank you so very much. I am a grandmother of 22 grandchildren and wish I had this a few years ago. I made one blanket last night, so easy and looks so nice. Thanks again
ReplyDeleteGood idea to take pictures of every step along the way. You did have a little problem with lighting, but the pictures still made it easier to see what to do. Were you using Sony Cameras or what?
ReplyDeleteWatch Jenny Doan from Missouri Quilt Company on YouTube and she does a live tutorial for this selfbinding receiving blanket using a 40" and a 30" piece instead of the larger pieces. It is easy to understand the miter by watching it live. It's the same directions but seems easier to understand because it is live and she shows how to do it.
ReplyDeleteThanks so much for this tutorial. Made my first receiving blanket earlier today and it turned out great. The pictures were a great help.
ReplyDeleteEasy to do but not easy to understand ;) I was lost at how to stitch the front and back pieces together if they are different sizes, but you match up the edges just as if you were sewing two pieces of fabric together of the same size. Once you turn the piece inside out, the larger back piece will fold over forming the border and the top-stitching will secure to the two pieces together.
ReplyDeleteThank you! Now if makes total sense! :)
DeleteI just ran across this, and was happy to see my old Woodland Bloom fabric used in your tutorial! That was my very first line of fabric. Thanks for showcasing it so nicely!
ReplyDeleteWhat a cute and simple idea.
ReplyDeleteThanks for sharing
I made one and it turned out beautifully, until I washed it. The self binding all bunched up and looked terrible. It was beautiful before washing. Do you recommend prewashing the flannel to avoid this?
ReplyDelete